Top 10 Things to Fill a Leaking Portable Basketball Base?

Time:2026-10-19 Author:Aria
0%

A leaking portable basketball base can turn a simple driveway game into a slippery, frustrating problem. The right filler depends on the base design, leak location, and the manufacturer’s instructions. Many owners ask, “What can I use to fill a portable basketball base if it's leaking?” Common options include water, dry sand, or a manufacturer-approved stabilizing material. However, filling the base before inspecting the crack may hide the real problem.

Michael Turner, a portable sports-equipment repair specialist with more than 15 years of field experience, says, “The filler should improve stability without creating pressure that worsens the leak.” His advice highlights an important detail: weight is not the only concern. A plastic base can split around the drain plug, seams, or wheel assembly. Even a tiny opening may allow water to escape overnight, leaving damp patches beneath the hoop.

Small checks matter. Wipe the base dry. Add a little water. Watch closely. A practical repair may involve replacing a damaged plug, sealing a compatible seam, or switching from water to properly packed sand. Yet sand is not always ideal. It can absorb moisture, become difficult to remove, and add stress if the base is already weakened. I have seen advice online that sounds convenient but ignores the base’s age and plastic condition. That is worth questioning. This guide examines ten realistic filling and repair approaches, explains their advantages, and identifies choices that may create new problems instead of solving the leak.
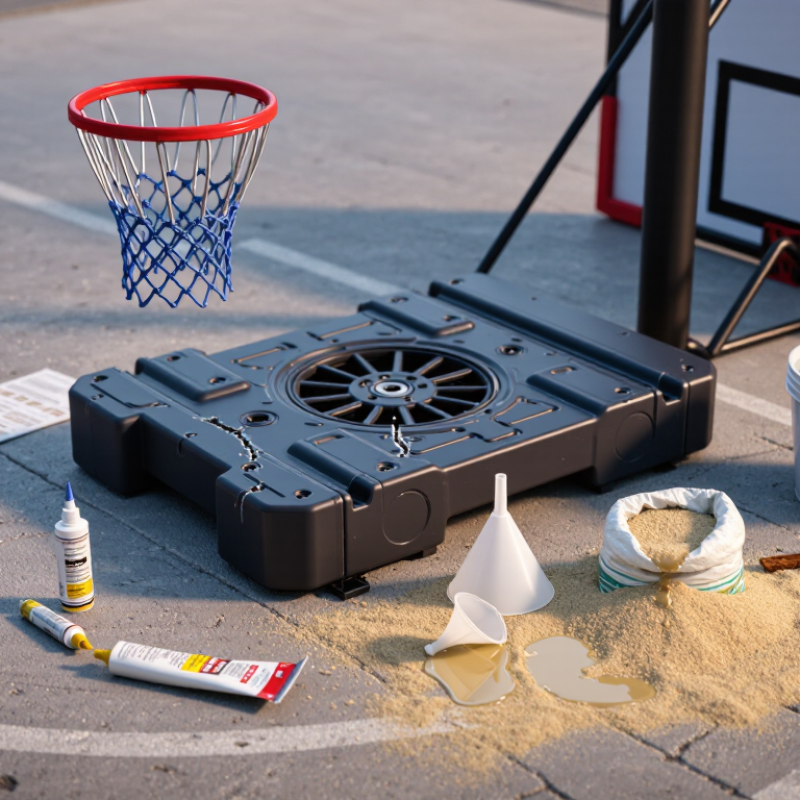
Top 10 Things to Fill a Leaking Portable Basketball Base?

How to Identify and Confirm a Leak in a Portable Basketball Base

A leaking portable basketball base can look stable while slowly losing support. The U.S. Consumer Product Safety Commission’s NEISS data place basketball among sports causing roughly half a million emergency-department visits in typical years. A weakened base increases avoidable risk. Check it before filling or playing.

Move the unit onto a dry, level surface. Wipe the base completely, including the drain plug, cap, molded seams, and wheels. Add water slowly, then mark the level with a pencil. Leave it untouched for 12 to 24 hours. It is easy to misread condensation. Place dry paper towels beneath each seam and plug. Wet spots reveal the location more clearly than eyesight alone. A faint white trail may indicate dried mineral deposits.

For confirmation, empty the base and inspect it under strong light. Look for hairline cracks around mounting points, sharp corners, and areas rubbing against concrete. Do not pressurize the base with an air compressor. That test can worsen hidden damage. ASTM F2673, the portable basketball goal safety specification, emphasizes stable support and secure structural components, not improvised pressure testing. If the level drops without visible moisture, repeat the test with the base elevated on dry blocks. This helps separate a base leak from wet ground. My practical mistake has been checking only the large plug; small seam damage can be harder to notice. A repair is questionable when the plastic is split, distorted, or leaking near the pole support. Replace the base or seek qualified service instead of relying on extra weight.

Top 10 Things to Fill a Leaking Portable Basketball Base

Approximate Mass Added by 100 Liters of Fill Material

Approximate values are based on typical bulk densities. Water is easy to remove, while sand and aggregate provide more lasting weight but can be difficult to empty. Concrete becomes effectively permanent and may damage a base that was not designed for it.

To confirm a leak, empty and dry the base, mark the fluid level, then add a measured amount of water. Place the base on a dry surface and inspect the drain plug, seams, wheels, and underside for fresh moisture. Do not refill the base until the leak has been repaired and retested.

Top Ten Suitable Materials for Filling a Leaking Basketball Base

A leaking portable basketball base needs a repair before filling. Water is convenient, but one gallon weighs about 8.34 pounds, so a 40-gallon base adds roughly 334 pounds. The SFIA 2024 Topline Participation Report recorded 28.1 million basketball participants in the United States during 2023. That level of use makes stability more than a cosmetic concern. ASTM F2273 guidance also emphasizes stable, properly secured basketball equipment.

For a patched base, suitable materials include clean water, dry play sand, washed construction sand, pea gravel, rounded river gravel, crushed limestone, recycled rubber granules, rubber mulch, cement-sand mix, and non-shrink grout. Water suits a sound base with a small sealed leak. Dry sand usually offers better long-term ballast, but damp sand can become heavy and difficult to remove. Pea gravel reduces moisture problems, while crushed limestone packs tightly around internal ribs. Rubber materials are lighter and may shift during impact.

My repair checks have taught me to inspect the plug, seams, and bottom corners first. A flexible plastic repair patch usually works better than simply adding heavier filler. Cement-sand mix and non-shrink grout create permanent ballast; they can crack if the base flexes. I would avoid expanding foam. It may press against weak plastic and leave hidden voids. Check the owner’s manual and local disposal rules. Do not mix materials blindly. A base can look full yet remain unstable.

How to Choose the Right Filler for Different Base Materials and Conditions

Top 10 Things to Fill a Leaking Portable Basketball Base?

A leaking base needs a dry, stable filler. The ten practical choices are water, play sand, washed masonry sand, fine gravel, pea gravel, rubber granules, rubber mulch, plastic pellets, a sand-rubber blend, and sealed water containers. Use only materials allowed by the base manual. USGS Mineral Commodity Summaries 2024 identifies construction sand and gravel as major high-volume mineral commodities. Their availability makes sand and gravel practical choices. USDA NRCS engineering tables place dry sand near 90–110 pounds per cubic foot, depending on moisture and grading. Fine sand usually packs better than rounded gravel.

Match the filler to the base material. For thick polyethylene bases, dry play sand usually limits movement and avoids water expansion. For thin plastic, plastic pellets or rubber granules may reduce impact stress. I once selected coarse gravel for a narrow opening. It bridged inside and left empty pockets. Convenient, but not ideal. Shake the base during filling, then check its balance. Never add concrete or expanding foam. They can create pressure and make future repairs difficult. Antifreeze is also a poor choice because leaks can harm people, pets, and surfaces. The National Weather Service notes that water expands about 9% when it freezes. Empty water-filled bases before freezing weather.

Tips: Inspect the seam, cap, and drain plug first. A filler cannot repair a structural crack. Seal the base only after it is completely dry. For outdoor setups, weigh the finished base and test it gently before play. Recheck it after heavy rain or strong wind.

Step-by-Step Guide to Draining, Filling, and Sealing the Base

A leaking portable basketball base needs a careful repair, not a quick refill. I once added water before checking the drain plug, and the leak returned within minutes. Move the hoop onto a level surface. Remove the plug and drain the base completely. Wear gloves, especially if the old water smells stale. Let the interior air-dry, or use a clean towel around the opening.

Inspect the base slowly. Look for splits near the wheels, seams, plug, and molded corners. A small crack can widen under the weight of water. Clean the damaged area with mild soap, then remove dust and grease. Allow it to dry fully.

Use a plastic-compatible waterproof repair sealant designed for outdoor equipment. Apply a thin layer from inside and outside when possible. Follow its curing time exactly. Rushing this step weakens the repair.

After curing, add a small amount of water and wait ten minutes. Check the ground for fresh drops. If it stays dry, fill the base gradually with clean water, leaving room for expansion. Dry play sand can provide heavier support, but it is difficult to remove and may hide future damage. Never mix random liquids or sharp materials inside the base. Replace the plug firmly, but do not overtighten it.

Test stability with gentle pressure before regular play. My earlier mistake was trusting a dry surface too quickly; inspect again the next day.

How to Test the Repair and Prevent Future Leaks

Top 10 Things to Fill a Leaking Portable Basketball Base?

A leaking base can shift, tilt, and weaken the entire system. CPSC NEISS annual estimates have exceeded 200,000 basketball-related emergency department injuries in recent years. Stability deserves careful attention. ASTM F2673 sets safety and performance requirements for portable basketball systems, including base stability. Empty the base completely before repairing it. Clean the crack, dry it, and apply a plastic-compatible repair compound. Do not use random expanding foam. It may hide damage without restoring strength.

Test the repair before adding full weight. Wrap dry tissue around the seam, plug, and corners. Mark the liquid level with a pencil. Fill the base halfway, then leave it on a level surface for 24 hours. Check for wet tissue, level loss, or soft spots. Repeat with a full fill. A small drop may reflect temperature changes, so inspect closely. I have found that rushed testing misses slow leaks. That mistake is easy to repeat.

Tips: Keep the base shaded when possible. Heat increases internal pressure. Tighten the cap gently, because overtightening can damage its seal. Inspect the drain plug every month. Replace cracked plugs rather than forcing sealant around them. Store the system level, not on one corner. If the base still leaks after repair, stop using the goal until the damaged part is replaced. A patch is not always a permanent fix.

FAQS

How can I check whether a portable basketball base is leaking?

Move it onto a dry, level surface. Wipe the base, seams, drain plug, cap, and wheels. Add water slowly. Mark the waterline with a pencil. Wait 12 to 24 hours. Place dry paper towels beneath seams and plugs. Wet spots expose small leaks.

How can I avoid mistaking condensation for a leak?

Dry the entire base before testing. Keep it away from wet grass and puddles. Check the paper towels, not only the plastic surface. A faint white trail may be dried mineral residue. Repeat the test on dry blocks if needed.

Which areas usually need close inspection?

Examine the drain plug, molded seams, bottom corners, wheels, and pole support. Check mounting points and sharp corners under strong light. Look for hairline cracks, distortion, rubbing marks, or dried deposits. Small seam damage is easy to miss.

Can I use compressed air to locate a hidden leak?

No. Do not pressurize the base with an air compressor. Pressure may enlarge hidden cracks or split weak plastic. A controlled water test is safer. My earlier mistake was trusting pressure-style testing too much.

What materials can fill a repaired basketball base?

Clean water works for a sound base with a properly sealed leak. Dry play sand usually provides heavier, longer-lasting ballast. Pea gravel reduces moisture concerns. Rounded gravel, crushed limestone, rubber granules, or rubber mulch may also work. Check the owner’s instructions before choosing.

Is sand always better than water inside the base?

Not always. Water is easy to add and remove. Sand weighs more and can be difficult to extract. Damp sand may become heavy and hide future leaks. Rubber fillers can shift during impact. The base may still feel unstable.

How should I repair and reseal a leaking base?

Drain the base completely and let the interior dry. Clean the damaged area with mild soap. Remove grease and dust. Apply a waterproof sealant made for outdoor plastic equipment. Use a thin layer inside and outside when possible. Follow the full curing time. Rushing weakens the repair.

How can I confirm the repair before normal play?

Add a small amount of water after curing. Wait ten minutes. Look for fresh drops underneath. If dry, fill the base gradually and leave expansion space. Tighten the plug firmly, but do not overtighten it. Test stability with gentle pressure. Check again the next day. My first inspection was too quick.

Conclusion

This guide explains how to locate and confirm a leak in a portable basketball base before attempting a repair. Check the plug, seams, drain opening, and underside for cracks, dampness, or escaping air, then empty and clean the base completely. If you are wondering, “What can I use to fill a portable basketball base if it's leaking,” suitable options may include water, dry play sand, masonry sand, pea gravel, fine gravel, rubber granules, plastic pellets, foam beads, repair-compatible filler, or a combination recommended for the base material. The best choice depends on the manufacturer’s instructions, the size of the opening, weather conditions, and whether the base is designed for liquid or solid weight.

The repair process includes draining the base, drying the damaged area, applying a compatible patch or sealant, allowing it to cure fully, and refilling it gradually. Test for renewed leakage, stability, and weight distribution before regular use. Inspect the base periodically, keep the plug tightly secured, protect it from sharp impacts and extreme temperatures, and address small cracks immediately to prevent future leaks.

Aria

Aria

Aria is a dedicated marketing professional with a deep passion for innovative strategies and a keen understanding of our company's product offerings. With a wealth of experience in the industry, Aria excels at crafting engaging content that highlights the unique features and benefits of our......