Installing trampoline springs looks simple, but small mistakes can create uneven tension and unnecessary frame stress. This guide explores China’s top 10 trampoline spring tools and explains how each tool supports a safer, more controlled installation process. You will see spring pullers, hook tools, protective gloves, measuring devices, and practical alignment aids.
The central question is, “How to put the springs on a trampoline the easy way?” The answer begins with preparation. Place the mat on a clean, level surface. Check the frame for bent sections, sharp edges, or loose joints. Count the springs before installation. A missing spring can change the mat’s balance significantly. Keep your fingers away from stretched coils. They can snap back quickly.
Experienced installers usually attach springs in an alternating pattern. Work across from one point to another, rather than filling one side completely. This approach spreads tension more evenly. A spring tool gives better control than bare hands, especially near the final attachments. Wear cut-resistant gloves and keep children away from the work area. These steps reflect common manufacturer guidance, but model instructions still matter. Spring lengths, hook shapes, and frame designs can differ.
The process is not always perfect. Some tools feel awkward at first. A spring may also resist more than expected. Pause and inspect the alignment instead of forcing it. After installation, check every connection and walk around the frame slowly. The mat should sit evenly, without twisted springs or loose gaps. Careful work takes longer, but it helps protect the equipment and the people using it.
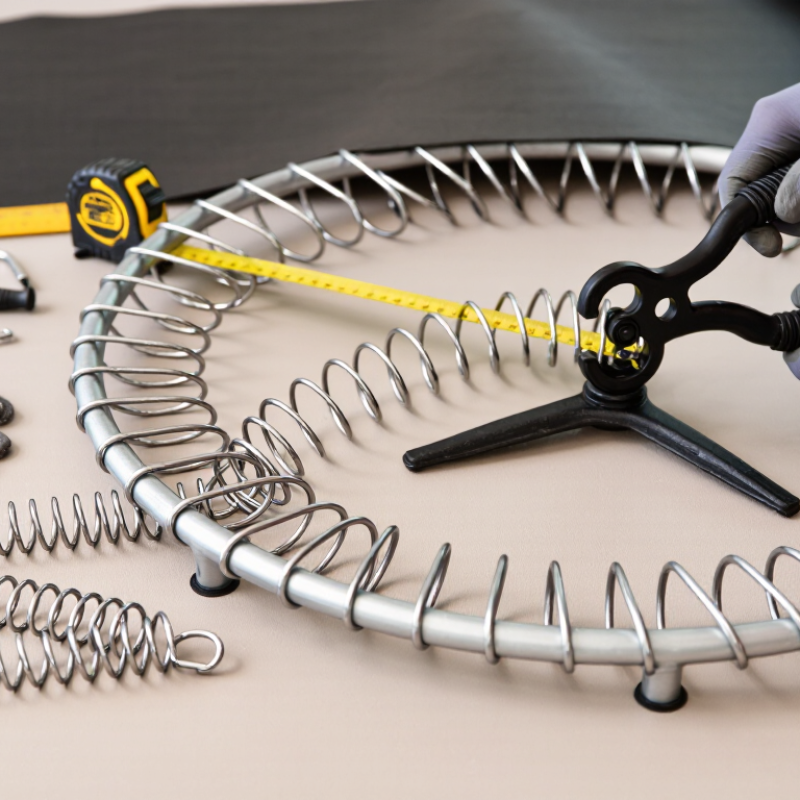
Chinese manufacturers produce many practical tools for trampoline spring installation and maintenance. The following ten tool types are widely made in China, although production details should be checked with each supplier: a T-handle spring puller, coil spring hook, long-reach spring tool, spring tension gauge, frame alignment bar, rubber mallet, needle-nose pliers, measuring tape, cut-resistant gloves, and protective safety glasses.
A T-handle puller gives better control when stretching a spring toward the frame hole. A coil hook works well in narrow gaps, while a long-reach tool reduces hand contact with nearby coils. The tension gauge helps technicians compare spring extension across the mat. This matters because uneven tension can create a tilted jumping surface. A frame alignment bar can correct small hole-position differences before the final springs are fitted. Use the rubber mallet carefully. Heavy strikes may bend the frame.
Measuring tape checks frame diameter and spring spacing before installation. Needle-nose pliers can remove bent hooks, but they are not ideal for pulling highly tensioned springs. Cut-resistant gloves improve grip, and safety glasses protect against unexpected release. In my workshop experience, inexpensive tools can perform well when their handles are firm and hooks are smoothly finished. Still, not every tool sold as “heavy duty” deserves that label. Inspect welds, coating, hook thickness, and measurement accuracy before use. I would also replace any stretched or rusty spring rather than forcing it back into service.
Top 10 trampoline spring tools ranked by practical usefulness for a standard residential spring installation.
The practicality score ranges from 1 to 5. A higher score indicates that the tool is more useful for safely removing, stretching, aligning, or checking trampoline springs. A spring puller, protective gloves, and safety glasses are the most important items for routine installation work.
Choosing the right tools starts with the trampoline’s spring dimensions, frame design, and installation angle.
Measure the spring length from hook to hook when unloaded. Check the wire diameter and hook shape as well. A spring puller with a rounded handle usually provides better control than pliers. It also keeps fingers away from compressed coils.
Wear cut-resistant gloves and safety glasses during every installation.
Fit matters more.
A tool that slips can release stored spring energy suddenly. The American Academy of Pediatrics has reported about 100,000 trampoline-related injuries annually in the United States, based on earlier national injury data. The U.S. Consumer Product Safety Commission also recorded nearly 100,000 hospital-treated trampoline injuries in 2002.
These figures are old, but they still show why tool selection deserves attention. Choose a puller that matches the spring hook, not merely the cheapest available option.
ASTM F381 outlines safety requirements for trampoline construction and use, although it does not replace careful installation training.
A measuring tape, spring gauge, and stable step platform can improve accuracy.
Never use improvised wire or a damaged screwdriver. Inspect the tool handle for cracks before applying force. Keep children away from the frame.
Measure twice. Install slowly.
In practice, even experienced installers can misjudge spring tension when weather changes the frame’s flexibility. That is one point worth reconsidering.
After installation, check equal spacing around the frame and test each spring for secure seating.
Preparing the trampoline correctly makes spring installation safer and more even. Place the frame on firm, level ground. Remove stones, moisture, and loose soil first. Check every rail for bends, cracked welds, or sharp edges.
A 2023 U.S. Consumer Product Safety Commission NEISS review continues to identify fractures, sprains, and falls among common trampoline injuries. A stable frame reduces avoidable movement.
Lay the mat inside the frame with its warning label facing upward. Count the spring holes before attaching anything. The number must match the frame and mat. Inspect each spring for stretching, rust, broken coils, or distorted hooks. Wear cut-resistant gloves and use a spring-pulling tool, not bare fingers. Attach springs in opposite pairs, working around the circle. This spreads tension and prevents the mat from shifting.
Keep the frame close to the ground during assembly. Measure the gap between the mat and frame at several points. Unequal spacing usually means a misplaced spring or a twisted mat. ASTM F381 safety specifications address trampoline components, assembly, and use, so installers should compare the product instructions with the current standard.
I sometimes see people tighten one side completely first. That feels efficient, but it can warp the frame. Recheck every hook. The last spring may still expose a mistake.
Before installing springs, inspect the frame, jumping mat, and V-rings in bright daylight. Replace bent metal, stretched springs, or torn fabric. Wear closed-toe shoes and protective gloves. A spring tool, measuring tape, and small container for loose parts make the job easier. Keep children and pets away from the work area.
Lay the mat inside the frame and attach one spring at each quarter point. Add the remaining springs in opposite pairs, moving around the circle evenly. Hook one end into the mat’s V-ring, then pull the other end toward the frame slot with the spring tool. Keep your fingers behind the tool. Never stretch a spring toward your face. The frame should remain balanced, not pulled heavily to one side.
I once rushed this step and missed a V-ring. The mat looked fine, but its tension felt uneven. Check every connection again. Count the springs against the assembly guide, and measure the gap between the mat and frame. It should look consistent around the edge. Press the mat gently by hand, then inspect for loose hooks or twisted springs. If a tool slips or the frame shifts, stop and reset the setup. Do not improvise with wire, rope, or damaged hardware.
Before installing trampoline springs, place the frame on level ground and wear cut-resistant gloves. Inspect every spring for rust, stretched coils, bent hooks, or cracked metal. A spring with uneven spacing can signal fatigue. Do not install it. Measure several unused-looking springs against the recommended length for your model. This check is easy to skip. It should not be.
Attach the mat to the frame in a balanced pattern, rather than completing one side first. Connect springs at opposite points, moving around the circle in small sections. Use a proper spring tool and keep your fingers outside the hook path. The coils should sit straight, with each hook fully seated in the frame and mat ring. After installation, walk around the frame and compare the visible gaps. Loose sections may indicate incorrect positioning or unequal tension. Press the mat gently near each spring. It should return evenly without sharp dips. A final inspection under bright light often reveals a twisted hook.
Tips: Count the springs before starting. Keep damaged parts separate. If tension varies noticeably, stop and adjust the pattern. Never pull a spring beyond its normal reach. I sometimes recheck the opposite side after one adjustment, because a small correction can shift nearby springs. Follow the equipment manual when measurements differ. When the frame moves or the mat feels unstable, seek inspection from a qualified repair professional.
| No. | Tool | Primary Function | Recommended Use | Basic Installation Method | Spring-Tension Inspection | Key Safety Check |
|---|---|---|---|---|---|---|
| 1 | Spring Pulling Tool | Pulls and hooks trampoline springs into the frame holes. | Most useful for standard steel extension springs. | Attach one hook to the spring end, pull toward the frame, and seat the opposite hook fully in the frame opening. | Compare spring length and alignment with neighboring springs after installation. | Keep hands away from the spring path and wear eye protection. |
| 2 | T-Hook Spring Tool | Provides extra grip and leverage for stretching springs. | Suitable when spring hooks are difficult to reach or tension is high. | Engage the spring loop, pull in a controlled straight motion, and release only after the hook is seated. | Check that the handle remains straight and that no spring is visibly overextended. | Do not twist the tool sideways while the spring is under load. |
| 3 | Spring Hook Pliers | Grips spring hooks for placement, removal, and adjustment. | Helpful for confined spaces and replacement work. | Hold the hook securely, guide it into the frame or mat V-ring, and avoid crushing the spring coil. | Look for evenly positioned hooks and matching spring angles around the frame. | Use pliers with insulated, non-slip handles and never pull toward the face. |
| 4 | Spring Spreader | Temporarily opens or separates spring coils during fitting. | Useful for replacing a distorted or tightly fitted spring. | Position the spreader carefully between coils, make a small adjustment, and seat the hook without forcing the metal. | Inspect for coil deformation, cracks, or permanent gaps after the tool is removed. | Use only light, controlled force; damaged springs must be replaced. |
| 5 | Measuring Tape | Measures frame dimensions, spring length, and spacing. | Used before installation and during troubleshooting. | Measure the frame diameter and confirm the replacement spring matches the original specification. | Measure several springs at corresponding positions; significant differences may indicate incorrect installation or wear. | Measure with the trampoline unloaded and do not rely on appearance alone. |
| 6 | Spring Length Gauge | Checks the unloaded length of extension springs. | Useful for identifying stretched or mismatched springs. | Remove the spring safely, place it against the gauge without stretching, and compare it with the specified size. | Replace a spring that is permanently elongated, visibly bent, heavily corroded, or has a damaged hook. | Never measure a loaded spring by placing fingers between its coils. |
| 7 | Spring Tension Tester | Measures the pulling force required to extend a spring. | Recommended for technical inspection or quality-control work. | Test a spring at a defined extension and record the force consistently for comparison. | Compare readings between equivalent springs; a large variation suggests wear, wrong size, or uneven loading. | Use the tester within its rated capacity and keep the line of pull clear. |
| 8 | Torque or Force Gauge | Provides a repeatable reading for controlled pulling or fastening tasks. | Useful when documenting inspection results or comparing sections. | Apply force gradually and record readings at the same extension or test position. | Check whether readings are consistent at opposite points of the trampoline. | Do not exceed the spring or gauge rating; calibrated equipment gives more reliable results. |
| 9 | Protective Gloves | Protects hands from sharp hooks, wire ends, and frame edges. | Recommended throughout spring installation and removal. | Wear well-fitting cut-resistant gloves while positioning springs and handling the frame. | Use gloves to inspect by touch only after all spring tension has been released. | Gloves do not replace a spring tool; never grip a loaded spring directly. |
| 10 | Safety Goggles | Protects the eyes from a released spring or broken metal fragment. | Required whenever springs are installed, removed, or tension-tested. | Put on goggles before handling any spring and keep bystanders outside the work area. | Inspect the trampoline only after confirming every spring hook is fully seated and stable. | Replace scratched or damaged eye protection and keep the work area clear. |
Common tools include a T-handle puller, coil hook, long-reach tool, tension gauge, and rubber mallet. Protective glasses and cut-resistant gloves are also important.
Match the puller to the spring hook shape, wire diameter, and installation angle. A rounded handle usually offers better control than pliers. The tool should not slip.
It helps compare spring extension around the entire mat. Uneven tension can tilt the jumping surface. Check several points, not just one.
Place the frame on firm, level ground. Remove stones, moisture, and loose soil. Inspect rails for bends, cracked welds, and sharp edges. Small details matter.
Count the spring holes in both parts before installation. The numbers should match. Also measure spring length from hook to hook when unloaded.
Attach springs in opposite pairs while moving around the frame. This spreads tension evenly and reduces mat movement. Do not complete one side first.
Pliers may remove a bent hook, but they are poor for highly tensioned springs. A proper puller keeps fingers farther from compressed coils. Improvised tools can release energy suddenly.
Check the handle for cracks, the hook for smooth finishing, and welds for weakness. Inspect coating, hook thickness, and measurement accuracy. “Heavy duty” labels may be misleading.
Replace rusty, stretched, broken, or distorted springs. Do not force a damaged spring back into service. That shortcut deserves reconsideration.
Measure the mat-to-frame gap at several locations. Check equal spring spacing and secure seating. If one gap differs, inspect for a twisted mat or misplaced spring.
This guide introduces the top 10 trampoline spring tools made in China, including spring pullers, hook tools, tension adjusters, protective gloves, measuring devices, and alignment aids. It explains how to choose tools according to spring size, frame design, user comfort, and safety requirements. Before installation, readers should inspect the frame for damage, place the mat correctly, organize the springs, and work on a clean, stable surface. Proper preparation makes the process more efficient and reduces the risk of injury or uneven tension.
The step-by-step section explains How to put the springs on a trampoline the easy way by attaching springs in a balanced pattern around the frame instead of completing one side at a time. The guide also recommends using controlled force, keeping fingers away from pinch points, and checking that each spring is seated securely. After all springs are installed, inspect the mat alignment, measure tension consistency, examine the frame connections, and perform a careful final review before use.

ProGear Sport